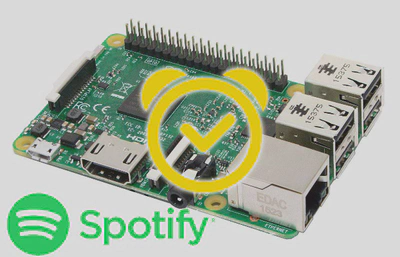
Wake Up with Spotify Alarm Clock for Raspberry Pi
Hate your boring alarm clock? In the first part of this tutorial series, we’ll start to explore how to wake up to your favourite Spotify playlist using your Raspberry Pi.
To get started, you will need:
- Raspberry Pi - any model should do, except Pi Zero. Pi 3 is preferred since it has integrated WiFi, giving us more flexibility over where the alarm can be placed.
- Speakers (with a standard 3.5mm jack cable or Bluetooth), analog amplifier, or USB soundcard
- Spotify Premium
- A non-Facebook Spotify username and password. If you created your account through Facebook you’ll need to create a “device password” to be able to use Mopidy-Spotify. Go to http://www.spotify.com/account/set-device-password/, login with your Facebook account, and follow the instructions.
Alternatively, you can learn how to make a Spotify alarm clock for a Ubuntu Linux laptop, desktop, or home theatre system.
Let’s start by installing the operating system:
Download Raspbian Jessie, the popular Raspberry Pi operating system.
Unzip the Raspbian image you downloaded to extract the image file (.img) and flash the Raspbian image to your SD card according to the following instructions dependent on your computer system:
Connect a monitor and keyboard to the Pi and use the
raspi-configtool to setup your Pi. Under “Advanced Options”, you might want to force the audio output to the 3.5mm jack. Otherwise, by default it will use the HDMI port for audio output if an HDMI cable is connected.Reboot, login, and enter
sudo -ito become the root user.
In order to interface with the Spotify platform, we will use Mopidy.
Install Mopidy:
 wget -q -O - https://apt.mopidy.com/mopidy.gpg | sudo apt-key add -
 sudo wget -q -O /etc/apt/sources.list.d/mopidy.list https://apt.mopidy.com/jessie.list
 sudo apt-get update
 sudo apt-get install mopidy
We will choose to run Mopidy as a system service, so go ahead and run
mopidy(still as the root user) to create an initial configuration file at/etc/mopidy/mopidy.conf.Activate the Spotify plugin by editing the file (e.g.
nano /etc/mopidy/mopidy.conf) to include the following:[spotify] username = YOUR_SPOTIFY_USERNAME password = YOUR_SPOTIFY_PASSWORD
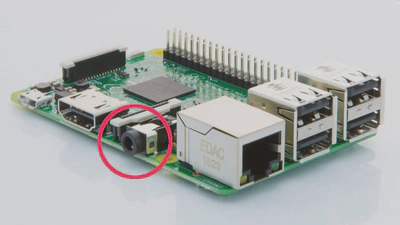
Next, let’s connect your speakers up to the audio output of the Raspberry Pi (circled in the image below), or alternatively configure a wireless speaker system or USB soundcard.
We ought to test that the sound is working correctly before proceeding, so run the following command and if everything is fine, you will hear a voice saying “Front Center”:
aplay /usr/share/sounds/alsa/Front_Center.wav
Otherwise, if you wish to change your audio output port, simply run sudo raspi-config.
Note that you can open Menu > Sound & Video > PulseAudio Volume Control to adjust the speaker volume and balance. You should see your speakers listed under the Output Devices tab.
Great! In next week’s tutorial, we’ll write a Python script to schedule an alarm that plays your favourite Spotify playlist via Mopidy. Later in the series, we’ll explore how to interface alarm snooze and stop buttons. Subscribe to our newsletter (top of the page) or follow me on Twitter for updates. Feel free to discuss your ideas or leave any comments or questions below!